Bass frequencies collect and gets amplified in the corner where two walls, a wall and the ceiling or floor meet. Those awful effect are handled using bass traps.
There exist a lot of commercial products, normally shaped as a triangular or square box made of foam. It is also possible to construct a DYI bass trap using Owens Corning 703 FRK fibre-glass insulation slabs, or similar slabs…
My studio’s acoustic nightmare:
My studio is located in an alcove (basically a 2.3 by 4.3 meter corridor) in the middle of my condo. There are exits to three different rooms, and it is not possible to close any doors. The studio is clearly visible from everywhere in the flat, and it is not possible to walk around without having to pass through it. It is basically an acoustic nightmare. But considering the price per m2 for my condo, I have to make the best out of every m2.
I considered, and disregarded, some “cheapish” solutions such as putting shelves of books, hanging clothes, a sofa etc in the studio. I also thought about hanging heavy cloths, such as carpets, on the walls.
Initial attempts:
After shopping 6 pieces of t.Akustik CBT-37 basstraps from www.thomann.de for €180, I realized the acoustic problems of my studio clearly needed something much more than just a few pieces of foam. The acoustic properties of the room was so bad, it was even impossible to identify the worst corners! Since there are no doors to close, the number of corners actually includes every adjacent room as well. From a visual point of view, I didn’t want to put a lot of acoustic material in neither the kitchen, bedroom or living room, not to mention it would cost me at least €600.
So, I thought it might be possible to build a huge bass trap, instead of several small? I figured, my studio area could contain three well-designed huge traps without sacrificing the appearance.
I’m certainly not skilled in DYI. In fact, this was the first project I’ve done in 20 years. So, if I could succeed – so can you.
Challenge:
I have a large, useless, cavity (0.25m deep, 1.2m wide and 2.75m high) in the back wall. It basically shouts to me “I’m causing a lot of audioable problems, fill me with acoustic material.”
Desired budget:
In the range of €100-€200.
Preparations:
After reading up on specifications of commercial acoustic materials, I decided to use mineral-wool slabs from Rockwool. Glass-fibre slabs, such as any Swedish version of Owens Corning 703 FRK would probably have worked just as well.
Steps:
The recommended way to build a normal-sized bass trap, is to make a wooden frame, onto which a single, fabric-covered, 45mm slab is fastened. However, I needed to stack a number of slabs, and I wanted it to be roughly 200-225mm deep. Also, due to the size of the trap, it had to be rigid enough to lift into position.
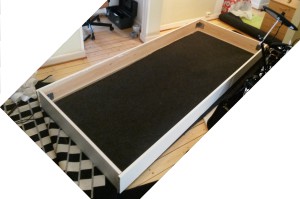 So I built a large wooden frame, 195mm deep, consisting of 195mm by 21mm pre-planed wooden beams, into which I would put 195mm deep Rockwool slabs. 195mm was chosen since I could buy both slabs and beams of that standard depth at the same hardware store. The outside size of the frame was 2.7m high and 1.15m wide.
The recommended way to build a normal-sized bass trap, is to put any (cheap) fabric on the back of a slab. But since I needed several slabs, it was easier to put the fabric on the back of the frame.
I used a piece of cheap carpet on the back, since I had bought it before I settled for the design. The choice to put a carpet, rather than some cheap fabric, actually turned out to be very good as I rose the completed trap against the wall.
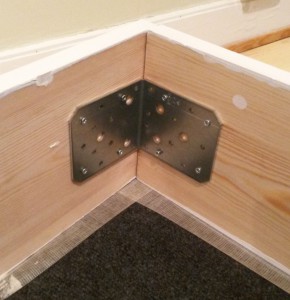
I fixed the frame using some 90×90 corner sheet metals. In hindsight, I’m satisfied I didn’t chose any smaller corners. After verifying that I could lift the frame in place (and it actually fit perfectly in the cavity!), I attached the carpet on the back side, using both carpet tape and a large number of nails. I wanted to make sure, no mineral fibres would ever escape out into my condo.
In an ideal world, the outside of the frame would never be visible, but I chose to paint the outside of the frame, just in case. In the end, that turned out to be unnecessary, so I could have skipped the painting and used some cheaper, non-pre-planed wood.
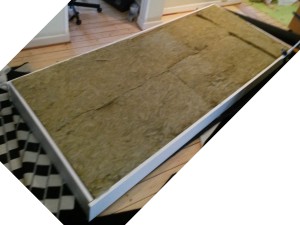
The inner width of the frame was a little smaller (1108mm) than the width of two slabs (565mm each). The slab widths are designed by the manufacturer to be slightly larger than the space given by two 45mm beams at cc 600mm, and they are supposed to be compressed a bit. For this bass trap, it turned out to be a perfect fit!
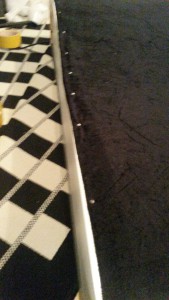 The recommended way to build a normal-sized bass trap, is to put a thin fabric on the front and edge of a slab. The fabric must allow air to pass through it, so the sound waves enter the actual bass trap, rather than bounce on the fabric.
Since the front will be visible, I wanted the fabric to look good. My original idea was to use a curtain, but due to the height of the bass trap, I had to buy fabric by the meter. As by a coincidence, a local low-cost-store Jysk, had a sale of thin fabric made of crushed velours.
As with the back, I fastened the fabric to the front of the frame, using carpet tape and nails. The velours can be stretched a little. But as you can see, it was hard to align the nails and edge of the fabric in a good way. I had anticipated this, and decided to use pre-painted 21x8mm wood strips to cover the nails.
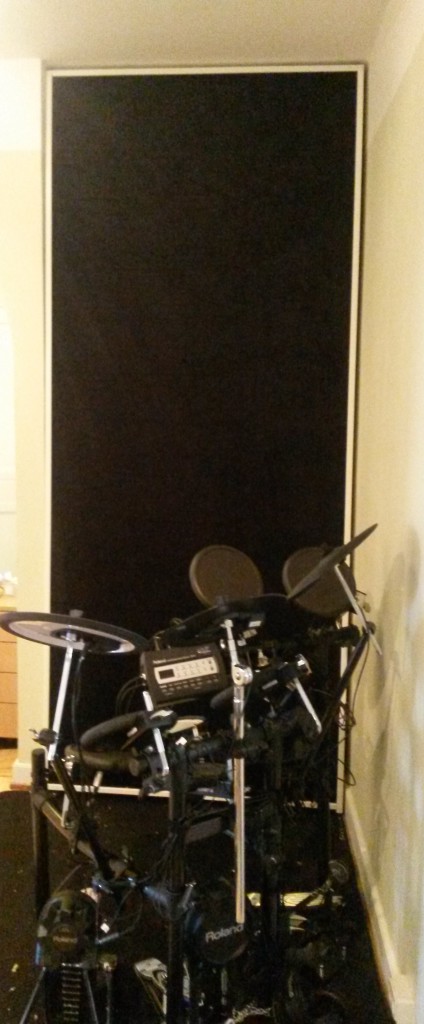 Finally, I lifted the entire bass trap into place. Now I realized something I never had guessed. It was heavy. I had been lazy, and hadn’t moved my drumkit away, thinking it would be possible to lift the trap anyway. Yes, it was possible, but it was hard to manoeuvre without scratching the walls or floor, knocking down the lamps from the ceiling or crushing the drumkit.
This was also the time I realized, the carpet on the back had been a good choice. The carpet handled the weight of the slabs without deforming during the lifting phase. Had I used velours, or cotton fabric, the slabs would have stretched the fabric, causing the entire trap’s stiffness to decrease.
I’ve read somewhere, the biggest mistake done when building normal-sized bass traps, is overdoing the wooden frame. But the weight and size of my trap, proved I definitely hadn’t overworked the frame. In fact, as I rose the trap, it easily wobbled in all directions. But once in place, it was rigid. For safety, I bolted the frame to the ceiling using two small 45x45x22mm corner plates.
The white wooden strips around the bass trap provided a nice contrast to the black fabric while matching the white ceiling.
Conclusion:
Building a bass trap is easy. If you can follow an average IKEA drawing, you can build a bass trap.
The entire trap was built and completely installed in about 6 hours, including the time required to clean up afterwards. The cost of the material used was approximately €150. The total cost was more than that, since I had to buy more material than I had to use, due to packet sizes.
Since I chose to use pre-planed beams and pre-painted wooden strips, and painted the sides of the frame, the cost was even higher than it really had to be. In fact, the cost of the wood, was actually twice that of the slabs!
If you already have spare insulation slabs and and wood left from a previous project, it is possible to build bass traps much cheaper than buying them. But, if you – as I – had to buy everything from scratch, it is necessary to build a lot of traps (or a very big one, as I did), in order to reach break-even.
On the positive side, I could fill the entire cavity, and design the bass trap as I wanted. I had plans to build two more traps using the same design, and cover the rest of the walls with the same fabric and wooden strips, which would give the entire studio a distinct look. The choice to cover the entire cavity with the bass trap also ensured, middle and high frequencies was absorbed in roughly 50% of the back wall.
The success gave me confidence to build the next two traps as well.

Leave a Reply